юли . 28, 2024 13:06 Back to list
Essential Steps to Create the Perfect Gabion Wall for Your Next Landscaping Project
Building the Best Gabion Wall A Step-by-Step Guide
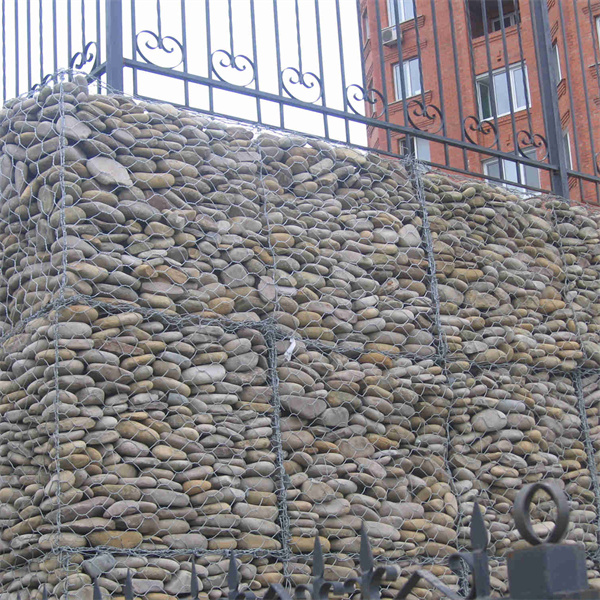
Gabion walls have gained significant popularity in landscaping and civil engineering due to their versatility, durability, and aesthetic appeal. Constructed from wire mesh cages filled with rocks or other materials, gabion walls offer an effective solution for erosion control, slope stabilization, and decorative barriers. If you're considering building a gabion wall, follow these steps to ensure a successful project.
Step 1 Planning and Design
Before you start building, proper planning is essential. Determine the purpose of your gabion wall, such as erosion control, privacy, or decorative appeal. Consider the location, size, and height of the wall. Establishing these parameters will guide your material choices and wall design. It's also important to check local regulations and zoning laws to ensure compliance, especially if the wall will exceed a certain height.
Step 2 Gathering Materials
Once you have a design in place, gather the necessary materials
1. Gabion Baskets Purchase or construct wire mesh baskets. They come in various sizes and shapes (rectangular, cylindrical), depending on your wall design. 2. Filling Material Choose appropriate materials to fill your gabion baskets. Common options include natural stones, recycled concrete, or even bricks. Make sure the material is inert and won’t degrade over time. 3. Tools Ensure you have the right tools, including gloves, safety goggles, a shovel, a level, and a measuring tape. Depending on the size of the wall, you may also need a sledgehammer or other heavy equipment.
Step 3 Preparing the Site
Clear the chosen site of vegetation, debris, and other obstacles. Level the ground where the gabion wall will be installed. If your wall will be taller, consider excavating a shallow trench for added stability. This trench should be slightly wider than the baskets to provide good footing.
Step 4 Assembling the Gabion Baskets
best gabion wall steps

Begin by assembling the gabion baskets according to the manufacturer's instructions. Ensure that the frames are securely held together and adequately shaped to maintain their structure over time. If needed, use a hammer to gently reshape or push the baskets into the desired shape.
Step 5 Filling the Gabion Baskets
Once the baskets are assembled, start filling them with your chosen materials. For a more attractive appearance, arrange the stones aesthetically, utilizing a mix of sizes to fill gaps and create a uniform look. Avoid overstuffing to maintain the integrity of the basket as it will expand when filled.
Step 6 Stacking and Securing
When filling multiple baskets, stack and interlock them for added stability. Use connecting wire to secure the edges of neighboring baskets to prevent movement over time. If you are building a higher wall, consider using a staggered formation, similar to bricklaying, to enhance structural integrity.
Step 7 Final Inspection and Backfilling
After the baskets are filled and stacked, conduct a thorough inspection. Ensure that everything is secure and level. If desired, backfill around the base of the wall with soil or additional stone to help anchor it further into the ground and promote drainage.
Conclusion
Building a gabion wall can be a rewarding project that enhances both your property’s functionality and aesthetic appeal. By following these steps – from planning and preparation to assembly and final inspection – you can create a durable, attractive structure that will serve its intended purpose for years to come. Remember to always prioritize safety and compliance with local guidelines to ensure a successful build.
-
The Role of Galvanized Gabion Mesh in Riverbank Protection
NewsJun.26,2025
-
The Role of Gabion Basket Raised Bed in Sustainable Gardening
NewsJun.26,2025
-
Quality Assurance of Wire Mesh Gabion Baskets
NewsJun.26,2025
-
Installation Guide for Welded Gabion Box
NewsJun.26,2025
-
How to Choose the Right Gabion Box
NewsJun.26,2025
-
Different Types of Gabion Wire Mesh
NewsJun.26,2025
-
Why PVC Coated Gabion Mattress Is the Best Solution for Long-Term Erosion Control
NewsMay.23,2025


