sept. . 23, 2024 01:45 Back to list
gabion steps
Building with Gabions A Step-by-Step Guide
Gabions, often made of wire mesh filled with rocks or other materials, have gained popularity in landscaping, civil engineering, and erosion control. Their versatility and durability make them an effective solution for various construction and design applications. This article outlines the steps to create a basic gabion structure, ensuring a sturdy and aesthetically pleasing result.
Step 1 Planning Your Project
Before diving into construction, it's essential to plan your gabion project. Determine the purpose of the gabions, whether for a retaining wall, decorative garden features, or erosion control. Assess the site conditions, including soil type, drainage, and slope. Create a design layout and select appropriate materials, including the type and size of gabion baskets, as well as the rock or fill materials you’ll use.
Step 2 Gathering Materials
Once your design is ready, gather all necessary materials. You will need gabion baskets, which can be made of galvanized wire or PVC-coated wire for extra durability. Additionally, source rocks or other fill materials—avoid using soft or crumbly stone as these won’t provide sufficient stability. Common choices include limestone, granite, or river rock. Don’t forget safety gear, such as gloves and eye protection.
Step 3 Preparing the Site
The next step involves site preparation. Mark the area where the gabions will be installed, clearing away any vegetation, debris, or loose soil. This ensures a stable foundation. If constructing a wall or large structure, consider leveling the ground and compacting it to prevent settling over time.
gabion steps

Step 4 Assembling the Gabions
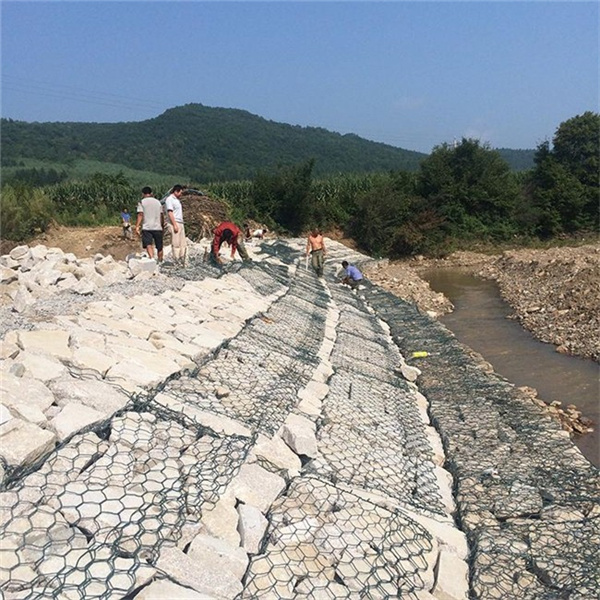
Begin assembling the gabion baskets according to the manufacturer’s instructions. Secure the wire mesh using ties or clips to maintain their shape. Place the baskets in the desired layout, ensuring they are level and stable. If building a wall, stagger the joints between baskets for added strength.
Step 5 Filling the Gabions
Once the baskets are in place, it’s time to fill them with the chosen material. Start from the back and work towards the front, ensuring even distribution. Use larger rocks at the bottom for stability and smaller ones on top for a snug fit. This layering technique enhances durability and aesthetic appeal.
Step 6 Final Touches
After the gabion baskets are filled and securely closed, consider adding finishing touches. You may want to cover the top with soil or additional landscaping materials, like gravel or plants, to integrate them seamlessly into your outdoor space.
Conclusion
Gabions offer a practical and visually appealing solution for a variety of construction needs. By following these steps, you can create a durable gabion structure that not only enhances your landscape but also provides functional benefits. Happy building!
-
Visualizing Gabion 3D Integration in Urban Landscapes with Rendering
NewsJul.23,2025
-
The Design and Sustainability of Gabion Wire Mesh Panels
NewsJul.23,2025
-
The Acoustic Performance of Gabion Sound Barriers in Urban Environments
NewsJul.23,2025
-
Mastering the Installation of Galvanized Gabion Structures
NewsJul.23,2025
-
Gabion Boxes: Pioneering Sustainable Infrastructure Across the Globe
NewsJul.23,2025
-
Custom PVC Coated Gabion Boxes for Aesthetic Excellence
NewsJul.23,2025
-
Installation Tips for Gabion Wire Baskets in Erosion Control Projects
NewsJul.21,2025


