Août . 06, 2024 12:57 Back to list
Affordable DIY Gabion Wall Solutions from Leading Factories for Your Outdoor Projects
Building a Low-Cost DIY Gabion Wall A Practical Approach
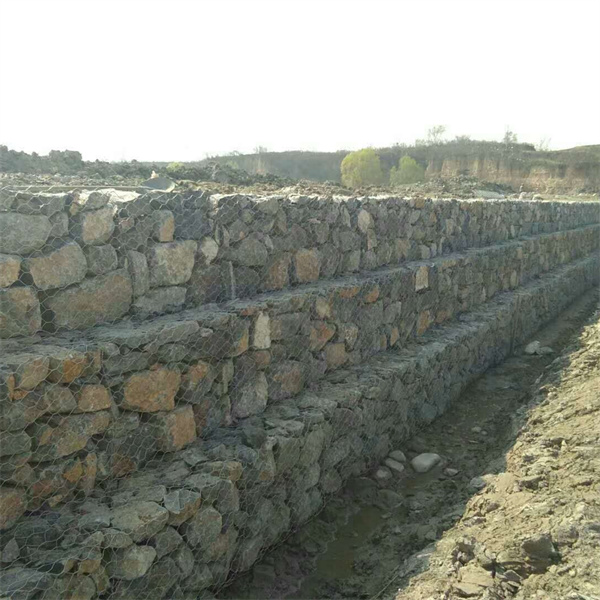
In the realm of landscaping and outdoor design, gabion walls have gained popularity as both functional and aesthetic features. These structures are essentially cages filled with rocks, stones, or other suitable materials, providing excellent strength, durability, and drainage capabilities. Constructing a gabion wall doesn't have to break the bank; with some ingenuity and effort, you can build a low-cost DIY gabion wall that enhances your outdoor space. Below, we’ll explore the steps involved in creating your own gabion wall, as well as the materials needed and potential applications.
Understanding Gabion Walls
Gabion walls are traditionally used for erosion control, structural support, or as decorative elements in gardens. The word 'gabion' originates from the Italian term ‘gabbione,’ meaning big cage. These walls are typically made from wire mesh or welded wire fabric that holds the filler material in place. Their versatility allows them to be used for various purposes, including retaining walls, garden borders, or even sound barriers.
Materials Needed
To build a low-cost DIY gabion wall, you will need
1. Wire Mesh or Welded Wire Fabric This will form the cage for your gabion. Look for high-quality, rust-resistant materials that can withstand outdoor elements. 2. Filler Stones You can use a variety of stones, such as granite, limestone, or even recycled concrete. Check local landscaping suppliers for affordable options. You can often find free or cheap materials from construction sites or posts on community fire sale groups.
3. Tools Basic tools such as pliers, wire cutters, gloves, a level, and a shovel might be necessary depending on how prepared your site is.
4. Gravel or Sand Depending on the site, you may need gravel or sand for drainage.
Step-by-Step Guide
low cost diy gabion wall factories

1. Planning and Design Begin with a design plan tailored to your specific needs. Measure the area where you want to construct your gabion wall and decide on its height, length, and width. Sketched designs can help visualize the project.
2. Site Preparation Clear the area of any vegetation, debris, or irregularities. If you are building a retaining wall, ensure the ground is leveled and compacted.
3. Cut and Shape the Wire Mesh Use wire cutters to cut the wire mesh into panels according to your design dimensions.
4. Assemble the Gabion Baskets Form the mesh into box-like shapes and secure the edges with wire. For larger walls, consider creating sections that can be easily transported and placed.
5. Fill the Baskets Assembling your walls might require multiple hands. Once your wires are in place, start filling the cages with stones. Mix larger rocks with smaller stones for stability and aesthetics. Ensure the stones are packed tightly to prevent shifting.
6. Level and Align As you fill each section, make sure to check that it is level and aligned as per your design. Use a level to adjust the sections accordingly.
7. Finishing Touches After filling all sections, you may want to cover the gabion wall with topsoil and plant vegetation on top to create a more natural look. Alternatively, leaving it as is can provide an industrial chic vibe that many find appealing.
Applications and Benefits
Gabion walls are not only cost-effective but also offer numerous benefits. They promote drainage and help prevent soil erosion, contributing to landscape stability. Additionally, these walls can be used as sound barriers or privacy screens when situated strategically in a yard.
In summary, constructing a low-cost DIY gabion wall is an achievable project that can enhance the beauty and functionality of your outdoor space. With readily available materials and a bit of creativity, you can create a durable structure that will stand the test of time while elevating your landscape's aesthetic appeal.
-
hesco-gabion-baskets-for-coastal-erosion-prevention
NewsAug.22,2025
-
longevity-and-durability-of-river-rock-gabion-walls
NewsAug.22,2025
-
how-to-integrate-gabion-3d-walls-in-urban-planning
NewsAug.22,2025
-
reno-mattress-gabion-applications-in-civil-engineering
NewsAug.22,2025
-
how-to-install-wire-mesh-for-gabion-baskets-properly
NewsAug.22,2025
-
best-materials-for-filling-a-chain-link-gabion
NewsAug.22,2025
-
Wire Mesh Thickness Impact on Gabion Wall Load Bearing
NewsAug.12,2025


