
Nov . 19, 2024 23:21 Back to list
diy gabion planter supplier
DIY Gabion Planter A Stylish and Eco-Friendly Addition to Your Garden
In recent years, gardening enthusiasts have increasingly looked to unique, sustainable solutions to enhance their outdoor spaces. One such trend that has captured the attention of DIY gardeners is the gabion planter. Combining functionality with a stunning visual appeal, gabion planters are not only an effective way to add greenery but also provide a striking focal point in garden design. This article will guide you through the steps to create your own DIY gabion planter and discuss where to find quality supplies for your project.
What is a Gabion Planter?
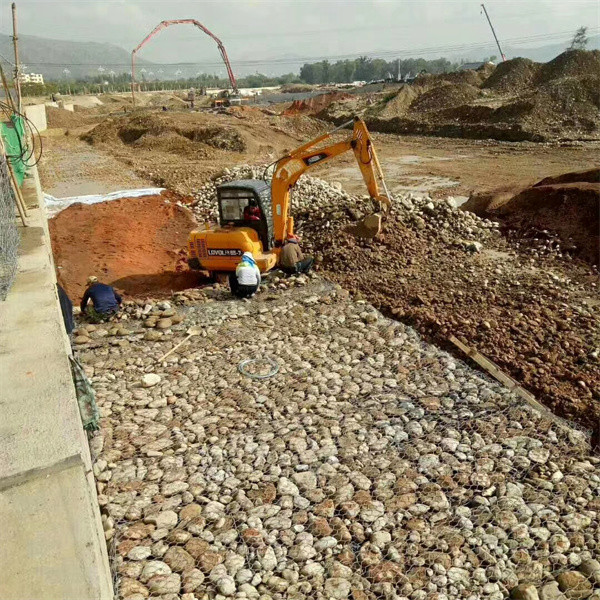
A gabion planter is essentially a structure made from wire mesh baskets filled with stones or other materials, serving as a decorative way to grow plants. The gabion structure acts like a retaining wall, while the interior serves as a planting area. This dual-purpose design makes it an excellent choice for both functional and aesthetic purposes in gardens, patios, or even urban environments.
Benefits of Gabion Planters
1. Durability Gabion planters are built to last. The wire mesh is resistant to rust and corrosion, while the stones provide a sturdy foundation that can withstand extreme weather conditions.
2. Eco-Friendly Using natural stones and metals for construction minimizes the environmental impact. Gabion planters can also incorporate recycled materials, promoting a sustainable lifestyle.
3. Versatility These planters come in various sizes and shapes, allowing you to customize your garden according to your preferences. They can be stacked or arranged in different configurations, enabling unique designs to suit your space.
4. Improved Drainage The gaps between stones allow excess water to drain away, preventing waterlogging and root rot in your plants.
How to Build Your Own Gabion Planter
Materials Needed
- Wire mesh (galvanized for rust resistance) - Decorative stones (your choice of color and size) - Heavy-duty gloves - Wire cutters - Wire ties or heavy-duty zip ties - Measuring tape - Potted soil and plants
diy gabion planter supplier
Step-by-Step Guide
1. Choose Your Design Decide on the size and shape of your gabion planter. Determine whether you want a rectangular or square planter, and the height should vary based on your gardening needs.
2. Cut the Wire Mesh Use wire cutters to cut sections of the wire mesh according to the desired dimensions of your planter. You will need four sides and a base.
3. Assemble the Frame Use wire ties to secure the corners of the mesh pieces together, forming a box shape. Ensure all corners are tightly secured to maintain structural integrity.
4. Fill with Stones Begin filling the gabion frame with your chosen stones. Layer the stones to create a visually appealing pattern. Keep the stones tightly packed for stability.
5. Planting Area Once the sides are filled, you may want to create a planting area at the top. You could add soil directly or place a planting box on top of the gabion to keep its structure intact. Fill this area with potting soil and choose the plants you wish to cultivate.
6. Finalize Your Design Consider adding finishing touches like garden edging or surrounding plants to create a cohesive look with the rest of your garden.
Finding Gabion Planter Supplies
When it comes to sourcing materials for your gabion planter, many local garden centers and home improvement stores carry wire mesh and decorative stones. Additionally, online suppliers often have a wide range of options at competitive prices. Sites specializing in landscaping supplies may also provide bulk purchasing options for larger projects.
Conclusion
Creating your own gabion planter can be a rewarding DIY project that not only beautifies your outdoor space but also promotes eco-friendly gardening practices. With durable materials and a bit of creativity, you can design a stunning feature that showcases your green thumb and adds a touch of rustic charm to your garden. So gather your supplies, roll up your sleeves, and let your gardening adventure begin!
-
Transform Your Outdoor Space with Gabion Fences
NewsApr.01,2025
-
The Versatility of Gabion Baskets for Your Projects
NewsApr.01,2025
-
The Importance of a Protective Net Sleeve for Your Valuable Investments
NewsApr.01,2025
-
The Benefits of Gabion Walls for Your Next Project
NewsApr.01,2025
-
Gabion Baskets
NewsApr.01,2025
-
Discover The Benefits of Protective Nets
NewsApr.01,2025
-
The Essential Guide to Gabion Supplies
NewsMar.12,2025
-
 Gabion Mattresses serves as a retaining wall, providing various prevention and protection works such as landslide prevention, erosion and scour protection as well as various type of hydraulic and coastal protection for river, sea and channel protection. This Gabion Mattress System is made up of a specially designed composite in order to maximize its performance through three phases of vegetative process from unvegetated to vegetation establishment up to vegetation maturation.
 -
 The hesco barriers is a modern gabion primarily used for flood control and military fortifications. It is made of a collapsible wire mesh container and heavy duty fabric liner, and used as a temporary to semi-permanent levee or blast wall against explosions or small-arms. It has seen considerable use in Iraq and Afghanistan.
 -
 3D Triangle bending fence panels an economical version of the panel system,
constructed from a Welded Wire Fence with longitudinal profiles that forms a rigid fence.Due to its simple structure ,easy installation and nice appearance,more and more customers regard this product as the preferred common protective fence. -
 A chain link fence is a type of woven fence usually made from galvanized or PE-coated steel wire.Chain link fence is a kind of elastic woven net, the net hole is even, the net surface is smooth, the net is simple, beautiful and generous, the net silk is high quality, not easy to corrode, the life is long, the practicability is strong.
 -
 Gabion basket also named gabion boxes, is weaved by corrosion resistance, high strength and good ductility galvanized wire or PVC coating wire through mechanical. Wire's material is zinc-5% aluminum alloy (galfan), low carbon steel, stainless steel or iron.
 -
 The gabion basket is made of twisted hexagonal woven mesh. The metal wire used to make gabion baskets is made of soft tensile heavy galvanized steel, and PVC coating can also be used for additional corrosion protection when the application requires.