Օգս . 17, 2024 03:15 Back to list
Affordable DIY Gabion Wall Ideas for Budget-Friendly Landscaping Projects
A Comprehensive Guide to Building a Low-Cost DIY Gabion Wall
Gabion walls have gained immense popularity as a versatile landscaping and construction solution. These walls, made from wire baskets filled with stones, provide both aesthetic appeal and structural integrity. They can be used for walls, fences, planters, or even erosion control, making them a fantastic addition to any garden or outdoor space. In this article, we will explore how to create a low-cost DIY gabion wall, ensuring that you achieve a beautiful and functional feature without breaking the bank.
Understanding Gabion Walls
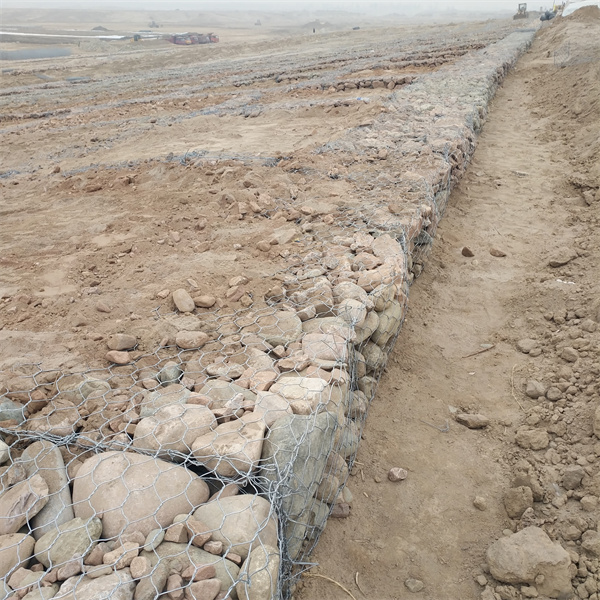
Gabion walls are constructed using wire mesh baskets that are filled with natural stones or rocks. The design allows water to flow through, which reduces pressure buildup and minimizes erosion. This permeability makes gabions particularly suitable for areas that experience heavy rain or flooding, making them a practical choice for homeowners looking to protect their properties.
Materials Needed
To build your own gabion wall, you will need the following materials
1. Gabion Baskets You can purchase these online or at local landscaping supply stores. Choose a size that fits your project. Alternatively, you can make your own using heavy-duty wire mesh. 2. Stones/Rocks Collect stones from your local area, or purchase them from a landscaping supplier. Ensure that they are of varying sizes for a more natural appearance. 3. Wire Cutters For cutting the wire mesh as needed. 4. Gloves To protect your hands during the construction process. 5. Level To ensure your gabion wall is straight and even.
Step-by-Step Guide
1. Plan Your Design Determine the dimensions and location of your gabion wall. A straight or slightly curved wall is easiest to construct.
2. Prepare the Ground Clear the area where you want to build the wall. Remove any debris, plants, or grass to ensure a solid foundation. You may also want to dig a shallow trench to provide added stability.
best low cost diy gabion wall

3. Assemble the Gabion Baskets If you purchased pre-made gabion baskets, follow the manufacturer’s instructions to assemble them. If you're making your own, cut the wire mesh into desired dimensions and form a rectangular shape, securing the ends with wire ties.
4. Fill with Stones Start filling the gabion baskets with stones. Place larger rocks at the bottom and fill in with smaller stones on top. This layering will add stability to your wall. Make sure to fill the baskets tightly to prevent movement.
5. Secure the Baskets Once filled, use additional wire ties or clips to secure the gabion baskets' tops. This will keep the stones in place and maintain the wall’s shape.
6. Level and Position As you add more baskets, use your level to ensure everything is even. Make adjustments as necessary to keep your wall straight and sturdy.
7. Finishing Touches Once the wall is at your desired height, consider adding greenery or decorative elements. Plants can be placed in front or even within the gaps of the gabion wall, creating a stunning visual impact.
Cost-Saving Tips
- Collect Stones Locally Instead of buying stones, consider collecting them from your property or nearby areas. Just be mindful of local regulations regarding rock collection. - Buy in Bulk If purchasing materials, consider buying in bulk to save on costs. - DIY Baskets Making your own gabion baskets can significantly cut down on expenses, especially if you have access to durable wire mesh.
Conclusion
Building a gabion wall is a rewarding DIY project that not only enhances your garden’s aesthetics but also adds structural value. By following this guide, you can create a low-cost gabion wall that is both functional and visually appealing. Embrace the creativity and satisfaction of building something with your own hands while enjoying the many benefits of this unique landscaping solution!
-
Why PVC Coated Gabion Mattress Is the Best Solution for Long-Term Erosion Control
NewsMay.23,2025
-
Gabion Wire Mesh: The Reinforced Solution for Modern Construction and Landscape Design
NewsMay.23,2025
-
Gabion Wall: The Flexible, Seismic-Resistant Solution for Modern Landscaping and Construction
NewsMay.23,2025
-
Gabion Wall Solutions: The Durable, Decorative, and Affordable Choice for Every Landscape
NewsMay.23,2025
-
Gabion Basket: The Durable and Flexible Alternative to Traditional Retaining Walls
NewsMay.23,2025
-
Gabion Basket: The Proven Solution for Slope Stability and Flood Control
NewsMay.23,2025
-
Versatility of Chain Link Fence Gabion
NewsMay.13,2025


