11-р сар . 10, 2024 02:22 Back to list
Crafting Your Own Gabion Basket in China for Unique Landscape Design
Building Your Own Gabion Basket A Step-by-Step Guide
Gabion baskets have become increasingly popular in landscaping and construction due to their aesthetic appeal and functional benefits. These wire mesh containers filled with rocks or other materials not only provide support but can also enhance the beauty of outdoor spaces. Whether you are looking to create a retaining wall, a decorative feature, or an erosion control solution, building your own gabion basket is an achievable DIY project. This article will guide you through the process of creating your very own gabion basket.
Materials Needed
Before starting, gather the necessary materials
1. Gabion Wire Mesh Choose a gauge that suits your project needs. Galvanized steel mesh is commonly preferred due to its durability and resistance to corrosion. 2. Rocks or Filling Material Select stones that are appropriate for the size of your gabion basket. You can choose from a variety of natural stones, concrete pieces, or even recycled materials.
3. Wire Cutters You will need these to cut the mesh to the desired size. 4. Gloves Protect your hands while working with sharp wire and heavy materials.
5. Water Level or Tape Measure Ensure your basket is level and properly sized.
6. Pliers These will help you secure the mesh together once it is formed.
Step 1 Measure and Cut the Wire Mesh
Begin by determining the size of your gabion basket. The dimensions will depend on its intended use—whether it will serve as a small planter or a larger wall structure. Once you have your measurements, use wire cutters to cut the gabion wire mesh according to your dimensions. You will need to cut four sides, a base, and a top for the basket.
Step 2 Assemble the Structure
china build your own gabion basket

Next, form the shape of the gabion basket. Start by laying the base piece flat and attaching the upright sides to it. Use pliers to twist the wire and secure the corners tightly. Ensure that the joints are sturdy because these areas bear most of the weight once filled. Attach the top piece after the sides are secured, but leave one side open for filling.
Step 3 Position the Gabion Basket
Once the structure is assembled, it's time to place it in its desired location. Use a level to ensure that the base is even. If the placement is on soft ground, consider creating a solid foundation by digging out the area slightly and adding gravel for support.
Step 4 Fill the Basket
Now comes the fun part—filling your gabion basket. Carefully fill it with the chosen rocks or material. If you’re using larger stones, start with those at the bottom. This ensures a stable base and allows smaller stones to fit in around them. You can create patterns or mix colors for aesthetic appeal as you fill. Once the gabion is filled, use the pliers to secure the open top section, bending the wire back in place.
Step 5 Finish and Style
With the gabion basket secure, you can now complete the project by creating a cohesive look in your landscape. Consider adding plants around the basket to soften the lines or incorporating mulch for a finished garden look. Gabion baskets can also serve as attractive seating areas or plant holders when topped with a wooden plank or stone slab.
Benefits of Gabion Baskets
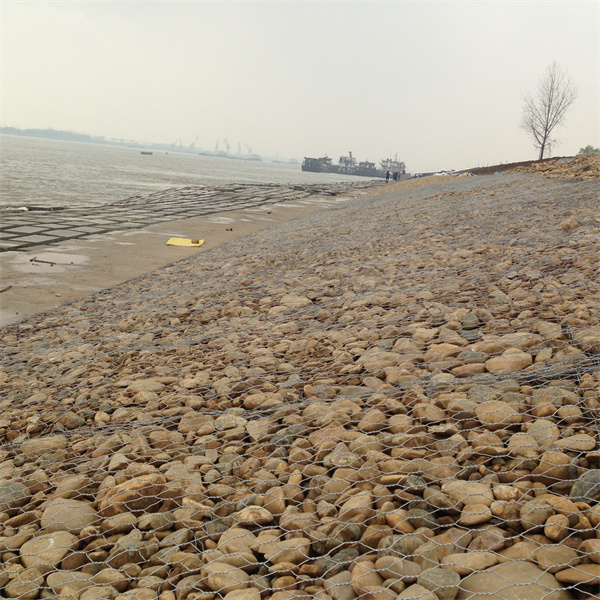
Beyond their functionality, gabion baskets offer numerous benefits. They are environmentally friendly, as they often use recycled materials and can promote natural drainage, preventing erosion. Their porous nature allows water to flow through, reducing pressure during heavy rainfall. Additionally, the aesthetics of gabion baskets can complement various design styles, from rustic to modern landscapes.
Conclusion
Building your own gabion basket is a rewarding project that combines functionality with charm. With just a few materials and some basic tools, you can create a beautiful and durable landscape feature. Follow these steps, and you will not only have a stunning addition to your outdoor space but also the satisfaction of having built it yourself. Happy building!
-
The Role of Galvanized Gabion Mesh in Riverbank Protection
NewsJun.26,2025
-
The Role of Gabion Basket Raised Bed in Sustainable Gardening
NewsJun.26,2025
-
Quality Assurance of Wire Mesh Gabion Baskets
NewsJun.26,2025
-
Installation Guide for Welded Gabion Box
NewsJun.26,2025
-
How to Choose the Right Gabion Box
NewsJun.26,2025
-
Different Types of Gabion Wire Mesh
NewsJun.26,2025
-
Why PVC Coated Gabion Mattress Is the Best Solution for Long-Term Erosion Control
NewsMay.23,2025


