Dec . 05, 2024 18:23 Back to list
DIY Guide to Crafting Gabion Baskets for Your Garden Landscaping Projects
Creating Homemade Gabion Baskets A Step-by-Step Guide
Gabion baskets have become an increasingly popular choice for landscape designers and homeowners looking to create aesthetically pleasing yet functional structures in their gardens and yards. These wire mesh containers filled with stones can be used for various purposes, including erosion control, garden borders, privacy screens, or decorative walls. While you can purchase pre-made gabion baskets, making homemade versions allows for greater customization and creativity. This article will guide you through the process of creating your own gabion baskets from scratch.
What You Need
To start off, gather the necessary materials and tools. You will need
1. Wire Mesh Galvanized wire mesh or welded wire fencing is ideal for durability. 2. Wire Cutters For cutting the mesh to your desired size. 3. Wire Heavy-duty wire to assemble the baskets. 4. Stones Choose from a variety of stones based on your aesthetic preference, including river rocks, granite, or limestone. 5. Gloves For safety while handling wire and stones. 6. Hacksaw If you need to adjust the dimensions of the wire mesh. 7. Measuring Tape To measure your materials accurately.
Step-by-Step Instructions
1. Determine the Size and Shape
Before you start building, decide on the size and shape of your gabion basket. Common shapes include rectangular, square, or even circular, depending on the application. A standard size for a rectangular basket might be 3 feet long, 2 feet wide, and 2 feet high, but feel free to adjust these dimensions based on your design needs.
2. Cut the Wire Mesh
Using your wire cutters, cut the wire mesh into six pieces that will form the sides, top, and bottom of the basket. Remember to add a couple of inches to each measurement to allow for folding and securing the edges together.
3. Assemble the Sides
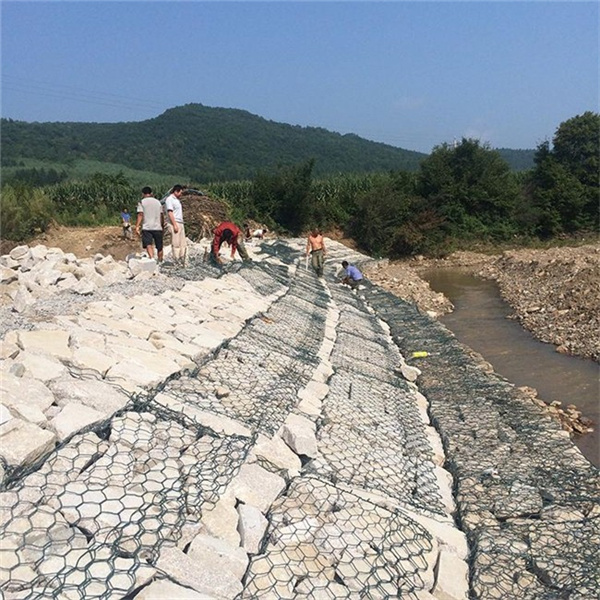
homemade gabion baskets factory

Begin by forming the sides of the gabion basket. Take four of the cut mesh pieces and create a rectangular shape by bending the edges to connect. Use the heavy-duty wire to tie the corners securely, ensuring that everything is tight and stable. The bottom piece should be added next; simply place it underneath and secure it in place with wire.
If you want your gabion basket to have a lid, cut an additional piece of wire mesh that matches the dimensions of the top. This provides the option to add stones in a layered approach or to access the contents of the basket more easily.
5. Fill the Basket with Stones
Now comes the fun part filling your gabion basket with stones! Your choice of stone will significantly impact the appearance of the finished product. Start layering the stones from the bottom, making sure to pack them tightly. You can create patterns or mix different types of stones for a more eclectic look. Fill the basket to the top, ensuring the stones are well compacted for stability.
6. Secure the Top
Once filled, it’s crucial to secure the top of the gabion basket. If you opted for a lid, simply place it on top and secure it with wire. If not, you can bend the top edges of the mesh inward and secure them using the heavy-duty wire.
7. Finishing Touches
You can paint or treat the wire mesh for an extra layer of protection against the elements. Moreover, consider planting climbing vines or flowers in front of the gabion basket to create an inviting and natural look in your garden.
Conclusion
Creating homemade gabion baskets is a rewarding project that can enhance your outdoor space. Not only do these structures provide functional benefits such as erosion control and privacy, but they also add aesthetic value with their unique stone compositions. By following these steps, you can craft your own customized gabion baskets, allowing for endless creativity and practicality in your landscaping endeavors. Enjoy the process, and relish the transformation of your garden!
-
Why PVC Coated Gabion Mattress Is the Best Solution for Long-Term Erosion Control
NewsMay.23,2025
-
Gabion Wire Mesh: The Reinforced Solution for Modern Construction and Landscape Design
NewsMay.23,2025
-
Gabion Wall: The Flexible, Seismic-Resistant Solution for Modern Landscaping and Construction
NewsMay.23,2025
-
Gabion Wall Solutions: The Durable, Decorative, and Affordable Choice for Every Landscape
NewsMay.23,2025
-
Gabion Basket: The Durable and Flexible Alternative to Traditional Retaining Walls
NewsMay.23,2025
-
Gabion Basket: The Proven Solution for Slope Stability and Flood Control
NewsMay.23,2025
-
Versatility of Chain Link Fence Gabion
NewsMay.13,2025


