Nov . 09, 2024 07:38 Back to list
DIY Guide to Building Your Own Gabion Wall at Home
DIY Gabion Wall A Comprehensive Guide to Building Your Own
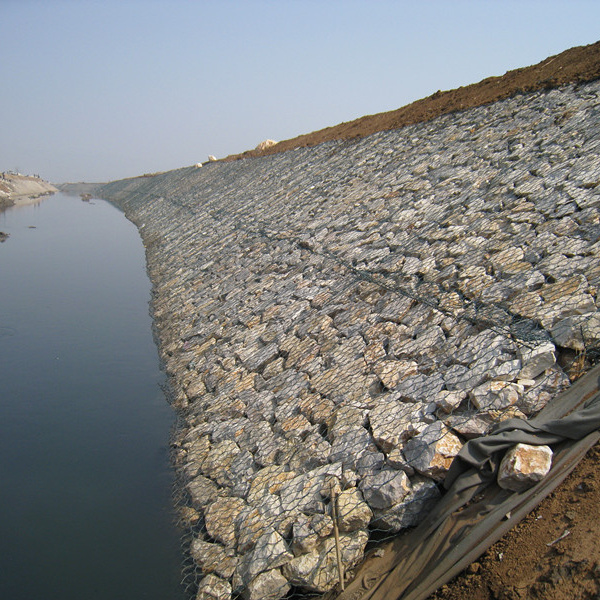
Gabion walls have become increasingly popular in landscaping and construction due to their durability, aesthetic appeal, and environmental benefits. These structures consist of wire mesh cages filled with rocks or other materials, and they can be used for various applications, including terracing, erosion control, and decorative features in gardens. By understanding the process and materials needed, you can create your own gabion wall that enhances your outdoor space while providing structural support.
Why Choose a Gabion Wall?
1. Durability Gabion walls are robust and can withstand harsh weather conditions, making them a reliable choice for long-term projects. The materials used, particularly the wire mesh, are resistant to rust and decay.
2. Aesthetic Appeal With a variety of materials available for filling, you can create a unique look that blends seamlessly into your landscape. From natural stones to recycled materials, the possibilities are endless.
3. Eco-Friendly Gabion walls promote natural drainage and reduce soil erosion, making them an environmentally friendly option. Moreover, they often utilize local materials, further minimizing their carbon footprint.
Materials Required
Before embarking on your DIY gabion wall project, gather the following materials
- Gabion Cages These are typically made of galvanized steel or stainless steel wire mesh, available at most home improvement stores. - Stone Fill The type of stone you choose will depend on the desired aesthetic. Options include river rocks, granite, limestone, or even recycled concrete. - Tools Essential tools include gloves, a shovel, a level, a measuring tape, and possibly a hammer or pliers for assembling the cages.
Step-by-Step Construction Guide
gabion wall diy factory

1. Planning and Design Start by planning the size and location of your gabion wall. Consider factors like the wall’s height, length, and the purpose it will serve. Use measuring tape to mark the area and create a rough sketch to visualize the project.
2. Preparation of the Site Clear the area where the wall will be built. Remove any grass, weeds, or debris, and level the ground to ensure a stable foundation. It may be necessary to dig a shallow trench for added stability, especially for taller walls.
3. Assembling the Gabion Cages Follow the manufacturer's instructions to assemble the gabion cages. Make sure to secure the panels tightly to avoid any collapsing or bulging as you fill them. Use zip ties or wire to reinforce the corners if necessary.
4. Filling the Cages Once the cages are assembled, carefully fill them with your selected stone. To achieve a visually appealing look, mix different sizes and colors of stones as you fill the cages. Use a shovel or your hands to pack the stones tightly, ensuring they do not shift once in place.
5. Stacking Gabion Cages If your design includes multiple layers, ensure that each cage is secured to the one below it. Use wire or rebar to tie them together securely. Make sure each layer is level; a spirit level will help with this task.
6. Finishing Touches After filling and stacking, inspect the wall for any loose stones or areas that may need additional filling. You may also consider adding vegetation around the base to help blend the wall into its surroundings and enhance its aesthetic appeal.
Maintenance Tips
While gabion walls are low maintenance, periodic checks are advisable. Inspect the wall for any signs of shifting or loose stones, especially after significant weather events. You can also refresh the stone fill if desired or add plants around the wall to further integrate it into your landscaping.
Conclusion
Building a DIY gabion wall can be a fulfilling project that not only enhances your property but also provides functional benefits. With the right materials, a clear plan, and some basic construction skills, you can create a stunning structure that stands the test of time. Whether you’re looking to control erosion, create a decorative feature, or build raised garden beds, a gabion wall is an excellent choice that anyone can tackle with the right guidance. So gather your materials and get ready to transform your outdoor space!
-
Why PVC Coated Gabion Mattress Is the Best Solution for Long-Term Erosion Control
NewsMay.23,2025
-
Gabion Wire Mesh: The Reinforced Solution for Modern Construction and Landscape Design
NewsMay.23,2025
-
Gabion Wall: The Flexible, Seismic-Resistant Solution for Modern Landscaping and Construction
NewsMay.23,2025
-
Gabion Wall Solutions: The Durable, Decorative, and Affordable Choice for Every Landscape
NewsMay.23,2025
-
Gabion Basket: The Durable and Flexible Alternative to Traditional Retaining Walls
NewsMay.23,2025
-
Gabion Basket: The Proven Solution for Slope Stability and Flood Control
NewsMay.23,2025
-
Versatility of Chain Link Fence Gabion
NewsMay.13,2025


