Dec . 09, 2024 16:26 Back to list
Constructing Custom Gabion Walls for Your Unique Landscape Needs
Building Your Own Gabion Wall A Step-by-Step Guide
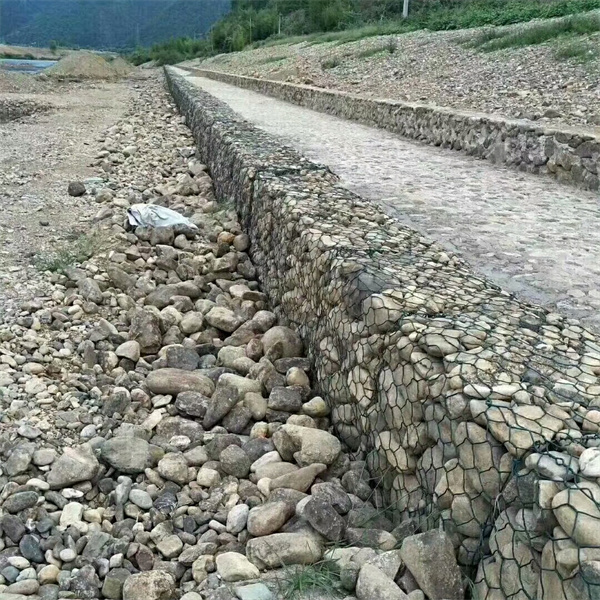
Gabion walls have gained popularity in both landscaping and civil engineering due to their durability, permeability, and aesthetic appeal. These walls, made from steel wire mesh filled with rocks or other durable materials, serve various purposes, including erosion control, noise reduction, and as decorative landscape features. If you're considering building your own gabion wall, this guide will walk you through the essential steps, materials, and techniques to ensure a successful project.
Step 1 Planning Your Project
Before you start construction, it’s crucial to plan your gabion wall project carefully. Begin by determining the purpose of the wall. Is it for aesthetic reasons, to retain soil, or to create a barrier? Next, choose the location of the wall, ensuring it is on solid ground and away from areas prone to flooding.
Measure the area where the wall will be built, taking note of the desired height, length, and width of the wall. Sketch a design to visualize how the wall will integrate with the surrounding environment.
Step 2 Gathering Materials
The primary materials needed for a gabion wall include
- Gabion Baskets These are typically made from galvanized steel wire mesh, which can resist rust and corrosion. - Filling Material Gravel, stones, or reclaimed concrete can be used. Choose materials that complement the natural surroundings. - Tools You will need gloves, wire cutters, a shovel, a level, a tape measure, and possibly a tamper to compact the soil.
Step 3 Preparing the Site
Once you have your materials ready, prepare the site for construction. Clear the area of any debris, vegetation, or rocks. If your wall will be higher than a few feet, consider digging a shallow trench to provide additional stability. Ensure the ground is level where the gabion baskets will sit, using a level to check your work.
build your own gabion wall factories

Step 4 Assembling the Gabion Baskets
Follow these steps to assemble the gabion baskets
1. Unroll the Mesh Start by unrolling the steel wire mesh and forming it into the shape of a basket. Typically, gabion baskets are rectangular or cubic. 2. Secure the Corners Use wire to fasten the corners of the baskets, ensuring they are sturdy and can hold the weight of the filling material. 3. Place the Baskets Position the assembled baskets in the prepared area, ensuring they are lined up correctly. Make sure they are level and adjust as necessary.
Step 5 Filling the Baskets
Once the baskets are in place, it’s time to fill them
1. Layer the Fill Start filling the baskets with your chosen material, layering it to prevent bulging. If you're using larger stones, place the larger pieces at the bottom and smaller ones on top for stability. 2. Compact the Fill After filling each layer, lightly compact the stones to minimize movement. 3. Repeat Continue until each gabion basket is completely filled. Close each basket by attaching the lid securely with wire.
Step 6 Finishing Touches
After all baskets are filled and secured, consider adding a top layer of soil or decorative stones to give your gabion wall a finished look. Plants can be added around the wall to enhance the natural aesthetics and help blend the structure into the landscape over time.
Conclusion
Building a gabion wall can be a rewarding DIY project that enhances your landscape while providing practical benefits. By carefully planning, gathering the right materials, and following the steps outlined above, you can create a functional and beautiful gabion wall that will stand the test of time. Whether for erosion control, privacy, or aesthetic appeal, your gabion wall will be a unique addition to your property. Happy building!
-
Why PVC Coated Gabion Mattress Is the Best Solution for Long-Term Erosion Control
NewsMay.23,2025
-
Gabion Wire Mesh: The Reinforced Solution for Modern Construction and Landscape Design
NewsMay.23,2025
-
Gabion Wall: The Flexible, Seismic-Resistant Solution for Modern Landscaping and Construction
NewsMay.23,2025
-
Gabion Wall Solutions: The Durable, Decorative, and Affordable Choice for Every Landscape
NewsMay.23,2025
-
Gabion Basket: The Durable and Flexible Alternative to Traditional Retaining Walls
NewsMay.23,2025
-
Gabion Basket: The Proven Solution for Slope Stability and Flood Control
NewsMay.23,2025
-
Versatility of Chain Link Fence Gabion
NewsMay.13,2025


