Oct . 11, 2024 12:01 Back to list
diy gabion planter factory
DIY Gabion Planter A Guide to Creating Your Own
In recent years, gabion structures have gained popularity not only for their functionality in landscaping and erosion control but also for their aesthetic appeal. Gabion planters combine the utilitarian aspects of these wire mesh cages filled with stones or gravel with the beauty of flourishing plants, making them an ideal project for both gardening enthusiasts and DIY lovers. In this guide, we’ll take you through the steps to create your own gabion planter, transforming your outdoor space into a stunning garden feature.
What is a Gabion?
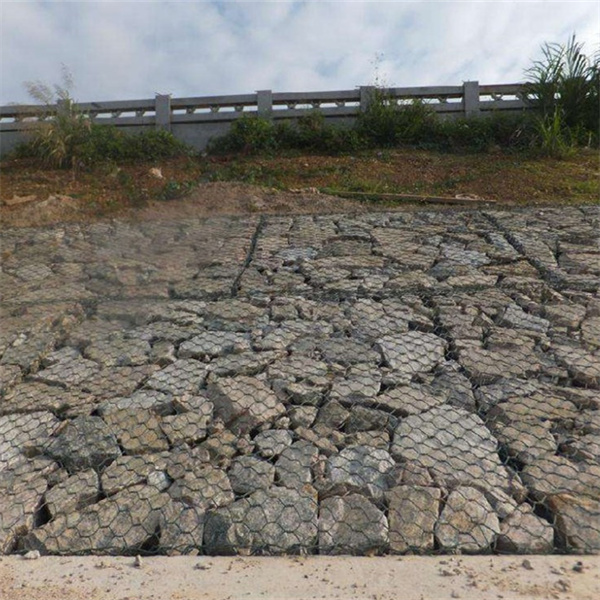
A gabion is essentially a cage, basket, or container filled with rocks, concrete, or sometimes soil. Traditionally, these structures are used in civil engineering for stabilizing slopes or controlling erosion. However, their solid construction and unique appearance have made them a popular choice for decorative landscaping as well. Gabion planters take this concept and turn it into a beautiful and functional piece for your garden or patio.
Materials You'll Need
To begin your DIY gabion planter project, gather the following materials
1. Gabion Cages These can often be purchased pre-made at garden centers or online. Alternatively, you can make your own using galvanized wire mesh. 2. Filling Material Choose from a variety of materials such as river rocks, pebbles, or larger stones. If you're opting for a more traditional look, choose natural stones in varying sizes. 3. Soil Select good-quality potting soil for planting. 4. Plants Consider using a combination of flowers, herbs, or succulents, depending on your personal style and climate. 5. Tools You’ll need gloves, wire cutters (if making your own cages), a shovel, and a trowel.
Steps to Create Your Gabion Planter
1. Select the Location Choose a spot in your garden or patio that receives adequate sunlight and complements the surrounding landscape.
diy gabion planter factory

2. Prepare the Cage If you are using pre-made gabion cages, you can skip this step. Otherwise, measure and cut your wire mesh to create a rectangular or square cage. Ensure that it’s sturdy enough to hold the filling material.
3. Assemble the Gabion Cage Bend the edges of the wire mesh to form a box shape and securely fasten the corners with additional wire. Make sure to double-check that the structure is stable.
4. Fill the Cage Begin filling your gabion with your chosen rocks or gravel. Layer them evenly, ensuring the structure is tightly packed and that there are no large gaps. This stability is crucial, especially if you're stacking multiple cages.
5. Prepare the Planting Area Once the gabion cage is filled, create a small planting area at the top. You may need to add some soil on top of the stones to create a fertile environment for plants.
6. Choose and Plant Select your plants based on the sun exposure and soil conditions of your selected area. Consider drought-resistant plants for a low-maintenance planter or seasonal flowers for varied color throughout the year. Carefully plant your selections, ensuring they have enough space to grow.
7. Water Regularly After planting, water your gabion planter adequately and establish a routine to keep the soil moist. Monitor the plants as they grow, adjusting watering based on seasonal changes.
8. Maintain and Enjoy Regularly check on your gabion planter. Trim any dead leaves or overgrown plants, and replenish the rocks if any shift over time. Enjoy watching your planter evolve as the plants grow.
Conclusion
Creating a DIY gabion planter is a rewarding project that enhances your outdoor space while offering countless possibilities for personal expression. With their durability and unique appeal, gabion planters can serve as a focal point in any garden. Whether you prefer a rustic look or a more modern design, following these steps will yield a beautiful and functional addition to your home. So gather your materials and start building your gabion planter today—it’s time to cultivate beauty and creativity in your garden!
-
Visualizing Gabion 3D Integration in Urban Landscapes with Rendering
NewsJul.23,2025
-
The Design and Sustainability of Gabion Wire Mesh Panels
NewsJul.23,2025
-
The Acoustic Performance of Gabion Sound Barriers in Urban Environments
NewsJul.23,2025
-
Mastering the Installation of Galvanized Gabion Structures
NewsJul.23,2025
-
Gabion Boxes: Pioneering Sustainable Infrastructure Across the Globe
NewsJul.23,2025
-
Custom PVC Coated Gabion Boxes for Aesthetic Excellence
NewsJul.23,2025
-
Installation Tips for Gabion Wire Baskets in Erosion Control Projects
NewsJul.21,2025


