
Septemba . 22, 2024 13:02 Back to list
best gabion cage steps
Best Gabion Cage Steps A Comprehensive Guide
Gabion cages have become increasingly popular in landscaping and construction due to their versatility, sustainability, and aesthetic appeal. If you're considering incorporating gabion cages into your project, understanding the steps involved in constructing them is essential. Here’s a comprehensive guide to the best gabion cage steps.
Step 1 Planning and Design
Before diving into construction, it's crucial to plan your project meticulously. Determine the purpose of your gabion cages—whether for erosion control, structural support, or decorative landscaping. Consider the size, shape, and location of the cages. A well-thought-out design will enhance functionality and visual appeal.
Step 2 Gathering Materials
Once you have a plan, gather all the materials required for the installation. The primary components include
- Gabion Wire Cages Available in various sizes, these are typically made from galvanized steel or stainless steel for durability. - Filling Materials Rocks, stones, or recycled materials can be used. The choice depends on aesthetic preferences and structural requirements. - Tools Wire cutters, gloves, shovels, a level, and string line are essential for a smooth installation process.
Step 3 Preparing the Site
Prepare the chosen site for installation. Clear the area of debris, vegetation, and any obstructions. Level the ground to ensure the stability of the gabion cages. A solid foundation is crucial, particularly if the cages will bear weight or resist erosion.
best gabion cage steps
Step 4 Assembling the Gabion Cages
Start by unfolding the gabion cages according to your design. Depending on the type of cage, you may need to connect the panels using wire ties or clips. Make sure the structure is secure and that all panels are properly aligned. Use a level to confirm that the cages sit flat and straight.
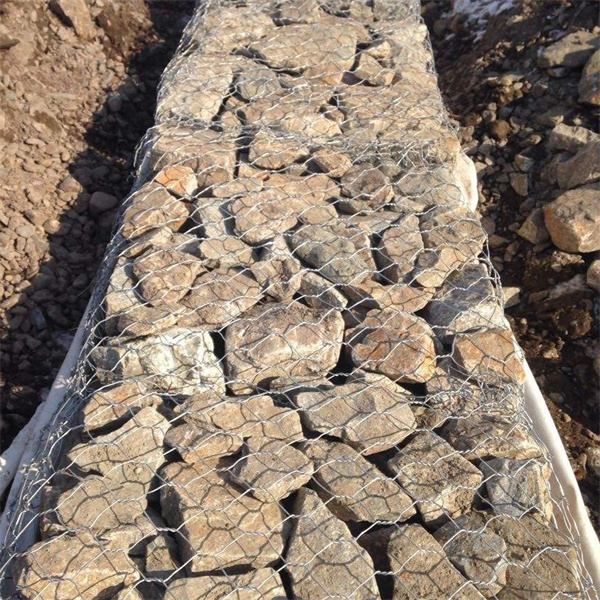
Step 5 Filling the Gabion Cages
Once the cages are assembled, it’s time to fill them with your chosen materials. Begin filling with larger stones at the bottom for stability, gradually adding smaller stones on top. A well-packed gabion cage ensures durability and efficiency. Avoid overfilling as it may compromise structural integrity.
Step 6 Securing and Closing the Cages
After filling, it’s important to close the cages securely. Fold the tops over and fasten them with wire ties. Ensure that the cages are tightly packed and that there are no gaps. This final step enhances the strength of the structure and prevents displacement.
Conclusion
Constructing gabion cages requires careful planning and execution. By following these steps, you can create functional and attractive structures that enhance your landscape while providing erosion control and stability. Whether you're an experienced builder or a DIY enthusiast, gabion cages are a worthwhile investment that can transform any space. Embrace creativity in your design, and enjoy the process of building with gabion cages!
-
Why PVC Coated Gabion Mattress Is the Best Solution for Long-Term Erosion Control
NewsMay.23,2025
-
Gabion Wire Mesh: The Reinforced Solution for Modern Construction and Landscape Design
NewsMay.23,2025
-
Gabion Wall: The Flexible, Seismic-Resistant Solution for Modern Landscaping and Construction
NewsMay.23,2025
-
Gabion Wall Solutions: The Durable, Decorative, and Affordable Choice for Every Landscape
NewsMay.23,2025
-
Gabion Basket: The Durable and Flexible Alternative to Traditional Retaining Walls
NewsMay.23,2025
-
Gabion Basket: The Proven Solution for Slope Stability and Flood Control
NewsMay.23,2025
-
Versatility of Chain Link Fence Gabion
NewsMay.13,2025
-
 Gabion Mattresses serves as a retaining wall, providing various prevention and protection works such as landslide prevention, erosion and scour protection as well as various type of hydraulic and coastal protection for river, sea and channel protection. This Gabion Mattress System is made up of a specially designed composite in order to maximize its performance through three phases of vegetative process from unvegetated to vegetation establishment up to vegetation maturation.
 -
 The hesco barriers is a modern gabion primarily used for flood control and military fortifications. It is made of a collapsible wire mesh container and heavy duty fabric liner, and used as a temporary to semi-permanent levee or blast wall against explosions or small-arms. It has seen considerable use in Iraq and Afghanistan.
 -
 3D Triangle bending fence panels an economical version of the panel system,
constructed from a Welded Wire Fence with longitudinal profiles that forms a rigid fence.Due to its simple structure ,easy installation and nice appearance,more and more customers regard this product as the preferred common protective fence. -
 A chain link fence is a type of woven fence usually made from galvanized or PE-coated steel wire.Chain link fence is a kind of elastic woven net, the net hole is even, the net surface is smooth, the net is simple, beautiful and generous, the net silk is high quality, not easy to corrode, the life is long, the practicability is strong.
 -
 Gabion basket also named gabion boxes, is weaved by corrosion resistance, high strength and good ductility galvanized wire or PVC coating wire through mechanical. Wire's material is zinc-5% aluminum alloy (galfan), low carbon steel, stainless steel or iron.
 -
 The gabion basket is made of twisted hexagonal woven mesh. The metal wire used to make gabion baskets is made of soft tensile heavy galvanized steel, and PVC coating can also be used for additional corrosion protection when the application requires.