Nov . 06, 2024 13:34 Back to list
Top Tips for Effective Gabion Wall Installation Techniques
The Best Gabion Wall Installation A Complete Guide
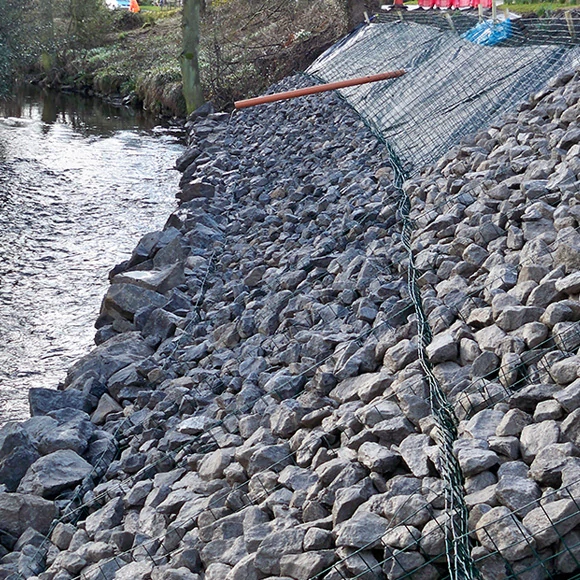
Gabion walls have gained immense popularity in recent years, both for their functional benefits and aesthetic appeal. These structures, made of wire mesh cages filled with stones, offer a unique solution for various landscaping and engineering needs. Understanding the best practices for gabion wall installation can ensure durability, stability, and visual appeal. Here’s a comprehensive guide to help you through the process.
Step 1 Planning and Design
Before jumping into the installation process, careful planning is essential. Determine the purpose of your gabion wall—whether it’s for erosion control, creating terraces, or as a decorative feature. Assess the site to identify the best location, taking into account soil type, drainage, and potential obstacles.
It's crucial to design the wall accordingly. Gabion walls can be built in various shapes and sizes, depending on the intended use. Ensure you calculate the required dimensions and volume of stones needed, as well as the number of gabion baskets.
Step 2 Selecting Materials
Choosing the right materials is fundamental for the longevity and effectiveness of your gabion wall. High-quality wire mesh made from galvanized steel or stainless steel is essential to prevent rusting and corrosion over time. Additionally, select stones that are durable, such as granite or limestone, to ensure stability and avoid deterioration.
When choosing the stones for filling, consider their size; typically, stones used are between 4 to 8 inches in diameter. If you're looking for a more decorative finish, consider using colored or rounded stones that can enhance the aesthetic value of the wall.
Step 3 Preparing the Site
Preparation of the site is vital for an effective installation. Initially, mark the area where the gabion wall will be built. Remove any vegetation, debris, or loose soil that could affect the structure’s stability. If the wall is to be tall or retain significant weight, it’s advisable to excavate a trench that is at least a foot deep to create a solid foundation.
best gabion wall installation

Ensure the ground is level and compacted appropriately to avoid shifting after installation
. If working on a slope, proper drainage must be considered to prevent water accumulation behind the wall.Step 4 Assembling Gabion Baskets
After preparing the site, it’s time to assemble the gabion baskets. These baskets can be purchased pre-assembled or as flat packs. If assembling on-site, follow the manufacturer's instructions to ensure a sturdy construction. It's crucial to secure the corners and edges properly, using wire ties for added stability.
Once the baskets are assembled, position them in the prepared area according to your design. You may want to stack the baskets to create a taller structure, ensuring that each layer is securely tied to the one below.
Step 5 Filling the Gabion Baskets
Carefully fill the baskets with stones. Aim for a systematic approach—start by placing larger stones at the bottom for stability, then fill in with smaller stones on top. Ensure that stones are packed tightly to minimize movement and shifting, which can compromise the wall’s integrity.
As you fill, occasionally check for levelness and alignment. Use a level to ensure that your wall remains straight and true to your design.
Step 6 Finishing Touches
Once the baskets are filled and secured, complete the installation with finishing touches. You may want to add soil and plants around the wall to integrate it into the landscape aesthetically. This can also enhance the wall's drainage capabilities.
In conclusion, installing a gabion wall requires thoughtful planning, quality materials, and careful execution. By following these steps, you can create a robust structure that not only serves its intended purpose but also complements the natural beauty of your landscape. With proper maintenance, your gabion wall can last for many years, offering both functional benefits and visual appeal.
-
Visualizing Gabion 3D Integration in Urban Landscapes with Rendering
NewsJul.23,2025
-
The Design and Sustainability of Gabion Wire Mesh Panels
NewsJul.23,2025
-
The Acoustic Performance of Gabion Sound Barriers in Urban Environments
NewsJul.23,2025
-
Mastering the Installation of Galvanized Gabion Structures
NewsJul.23,2025
-
Gabion Boxes: Pioneering Sustainable Infrastructure Across the Globe
NewsJul.23,2025
-
Custom PVC Coated Gabion Boxes for Aesthetic Excellence
NewsJul.23,2025
-
Installation Tips for Gabion Wire Baskets in Erosion Control Projects
NewsJul.21,2025


