Eki . 21, 2024 09:24 Back to list
Guide to Installing a Gabion Wall from Factory Specifications
Installing Gabion Walls A Comprehensive Guide
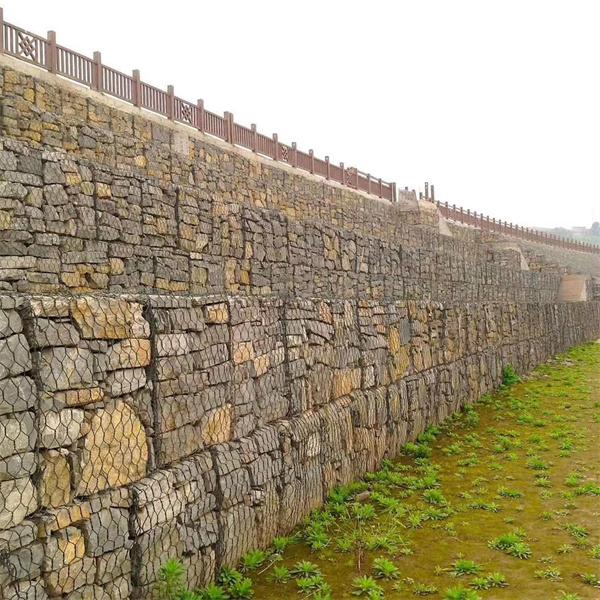
Gabion walls are increasingly popular in landscaping and civil engineering due to their unique aesthetics, versatility, and structural stability. Typically constructed from galvanized steel wire cages filled with stones or rocks, these walls serve various purposes, from erosion control to decorative landscaping features. In this article, we will cover the essential steps for installing a gabion wall, as well as factors to consider for a successful project.
1. Planning and Design
Before diving into the installation, proper planning is crucial. Start by determining the purpose of your gabion wall. Are you looking to create a retaining wall to hold back soil, or do you want to enhance your landscape's visual appeal? Measure the area where the wall will be constructed, taking into account the wall’s height, length, and width. Sketch a design that reflects your vision and consult local regulations to check for any restrictions or permits required for building structures.
2. Choosing the Right Materials
Once your design is set, it's time to select the materials. Gabion baskets come in various sizes and shapes, but the most common type is rectangular wire baskets. Ensure that the gauge of the wire is suitable for the intended load. For the filling material, choose durable stones or rocks that are locally available and fit well within the mesh of the baskets. Popular choices include granite, limestone, and river rock. Additionally, consider the appearance of the stone, as it contributes to the overall aesthetic of the wall.
3. Preparing the Site
The next step is to prepare the site for installation. Clear the area of any vegetation, debris, or obstructions. This process may involve excavating the soil to create a level base where the gabion wall will sit. It’s important to ensure that the foundation is stable, as a poorly constructed base can lead to structural failures over time. Some projects may necessitate drainage solutions to prevent water buildup behind the wall, which can lead to erosion.
4. Assembling the Gabion Baskets
installing gabion wall factory

With the site prepared, it’s time to assemble the gabion baskets. Lay the baskets on the leveled ground and connect them according to the manufacturer’s instructions. Depending on the wall's height, you may choose to stack multiple baskets. When stacking, ensure the structure is secure by using tie wires to connect adjacent baskets. It’s essential to maintain the alignment and level of the baskets to achieve a visually appealing and stable wall.
5. Filling the Baskets
Once the baskets are securely in place, it’s time to fill them with the chosen stone material. Begin filling the first layer, distributing the stones evenly. This process may require manual labor or machinery for larger projects. As you fill, take care to compact the stones well to reduce voids. Avoid overfilling; the tops of the baskets should be level with the top edges once filled to maintain a neat appearance.
6. Finalizing the Structure
After filling the baskets, check for any irregularities in height or alignment. Make necessary adjustments to ensure everything is even. If desired, you can add a top layer of larger stones or create a decorative cap for added stability and aesthetics. Finally, inspect the wall for stability and any potential gaps that need to be filled.
7. Maintenance Considerations
Gabion walls are relatively low maintenance, but they do require periodic checks. Inspect the wall for any signs of wear, especially after heavy rains or storms. Ensure that the drainage systems are functioning properly to prevent water buildup.
Conclusion
Installing a gabion wall can be a rewarding project that adds both functionality and beauty to your landscape. By following the steps outlined above, from planning and material selection to installation and maintenance, you can create a long-lasting structure that meets your needs. With their durability and natural appeal, gabion walls are an excellent choice for any outdoor space.
-
hesco-gabion-baskets-for-coastal-erosion-prevention
NewsAug.22,2025
-
longevity-and-durability-of-river-rock-gabion-walls
NewsAug.22,2025
-
how-to-integrate-gabion-3d-walls-in-urban-planning
NewsAug.22,2025
-
reno-mattress-gabion-applications-in-civil-engineering
NewsAug.22,2025
-
how-to-install-wire-mesh-for-gabion-baskets-properly
NewsAug.22,2025
-
best-materials-for-filling-a-chain-link-gabion
NewsAug.22,2025
-
Wire Mesh Thickness Impact on Gabion Wall Load Bearing
NewsAug.12,2025


