
جون . 21, 2024 17:36 Back to list
High-quality DIY gabion wall in minutes.
Building a High-Quality, Low-Cost DIY Gabion Wall
Introduction
Are you looking for an affordable and effective way to enhance the appearance and stability of your property? Look no further than gabion walls! Gabions are cage-like structures made from interlocking wire mesh filled with rocks or other fill material. They have been used for centuries in construction and engineering projects due to their strength, durability, and versatility. In this article, we will guide you through the process of building a high-quality, low-cost DIY gabion wall.
Materials Required
* Wire mesh (1x2m size)
* Rock or other fill material (enough to fill the cage)
* Hammer
* Pliers
* Measuring tape
* Wire cutters
* Safety gloves and glasses
Step-by-step Guide
1. Prepare the Site
Before starting, ensure that the area where you will be building the gabion wall is clear of any debris or obstacles. Mark the location of the wall and dig a trench along the base to accommodate the wire mesh cage. The depth of the trench should be slightly larger than the height of the cage.
2. Assemble the Cage
Unroll the wire mesh and lay it flat on the ground. Cut the mesh to the desired size using wire cutters, making sure to leave enough excess length to wrap around the ends. Fold the excess length over the edges of the mesh and secure it in place using pliers.
3. Install the Cage
Place the cage into the trench and adjust it until it is level Install the Cage
Place the cage into the trench and adjust it until it is level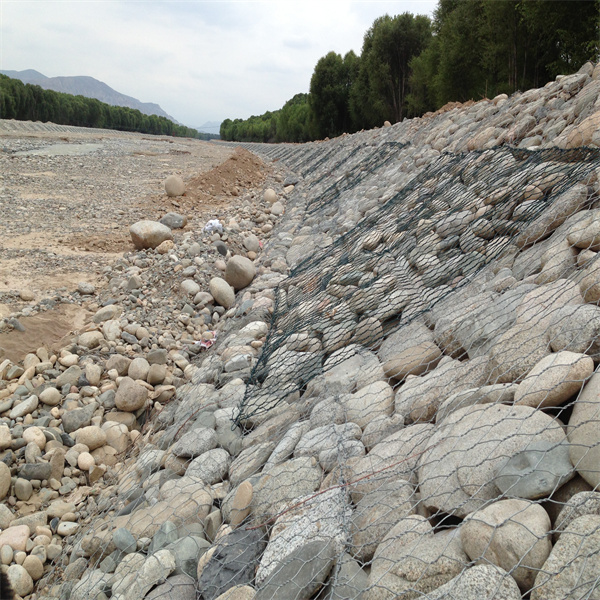 Install the Cage
Place the cage into the trench and adjust it until it is level Install the Cage
Place the cage into the trench and adjust it until it is levelhigh quality low cost diy gabion wall. Fill the cage with rocks or other fill material, making sure to compact them down as you go. Continue adding fill material until the cage is full and the top is level with the ground.
4. Secure the Mesh
Once the cage is filled, use the hammer to drive stakes into the ground on either side of the wall. Wrap the excess wire mesh around the stakes and twist it tightly to secure the mesh in place.
5. Finish the Wall
Add any additional features to the wall, such as decorative rocks or plants, to enhance its appearance. Once you are satisfied with the final result, fill in any remaining gaps between the rocks with soil or gravel.
Conclusion
Building a high-quality, low-cost DIY gabion wall is a rewarding project that can enhance the appearance and stability of your property. By following these simple steps, you can create a functional and aesthetically pleasing wall that will last for years to come. So why wait? Get started on your gabion wall project today!
Install the Cage
Place the cage into the trench and adjust it until it is level Install the Cage
Place the cage into the trench and adjust it until it is levelhigh quality low cost diy gabion wall. Fill the cage with rocks or other fill material, making sure to compact them down as you go. Continue adding fill material until the cage is full and the top is level with the ground.
4. Secure the Mesh
Once the cage is filled, use the hammer to drive stakes into the ground on either side of the wall. Wrap the excess wire mesh around the stakes and twist it tightly to secure the mesh in place.
5. Finish the Wall
Add any additional features to the wall, such as decorative rocks or plants, to enhance its appearance. Once you are satisfied with the final result, fill in any remaining gaps between the rocks with soil or gravel.
Conclusion
Building a high-quality, low-cost DIY gabion wall is a rewarding project that can enhance the appearance and stability of your property. By following these simple steps, you can create a functional and aesthetically pleasing wall that will last for years to come. So why wait? Get started on your gabion wall project today! Next:
Latest news
-
Transform Your Outdoor Space with Gabion Fences
NewsApr.01,2025
-
The Versatility of Gabion Baskets for Your Projects
NewsApr.01,2025
-
The Importance of a Protective Net Sleeve for Your Valuable Investments
NewsApr.01,2025
-
The Benefits of Gabion Walls for Your Next Project
NewsApr.01,2025
-
Gabion Baskets
NewsApr.01,2025
-
Discover The Benefits of Protective Nets
NewsApr.01,2025
-
The Essential Guide to Gabion Supplies
NewsMar.12,2025
Manufacturer of Silk Screen Products
QuanhuaProvide high-quality products and services to global customers.
-
 Gabion Mattresses serves as a retaining wall, providing various prevention and protection works such as landslide prevention, erosion and scour protection as well as various type of hydraulic and coastal protection for river, sea and channel protection. This Gabion Mattress System is made up of a specially designed composite in order to maximize its performance through three phases of vegetative process from unvegetated to vegetation establishment up to vegetation maturation.
 -
 The hesco barriers is a modern gabion primarily used for flood control and military fortifications. It is made of a collapsible wire mesh container and heavy duty fabric liner, and used as a temporary to semi-permanent levee or blast wall against explosions or small-arms. It has seen considerable use in Iraq and Afghanistan.
 -
 3D Triangle bending fence panels an economical version of the panel system,
constructed from a Welded Wire Fence with longitudinal profiles that forms a rigid fence.Due to its simple structure ,easy installation and nice appearance,more and more customers regard this product as the preferred common protective fence. -
 A chain link fence is a type of woven fence usually made from galvanized or PE-coated steel wire.Chain link fence is a kind of elastic woven net, the net hole is even, the net surface is smooth, the net is simple, beautiful and generous, the net silk is high quality, not easy to corrode, the life is long, the practicability is strong.
 -
 Gabion basket also named gabion boxes, is weaved by corrosion resistance, high strength and good ductility galvanized wire or PVC coating wire through mechanical. Wire's material is zinc-5% aluminum alloy (galfan), low carbon steel, stainless steel or iron.
 -
 The gabion basket is made of twisted hexagonal woven mesh. The metal wire used to make gabion baskets is made of soft tensile heavy galvanized steel, and PVC coating can also be used for additional corrosion protection when the application requires.