
Feb . 15, 2025 02:39 Back to list
gabion wall slope factories
Building a low-cost DIY gabion wall can transform your garden or outdoor space into an aesthetically pleasing and functional area. Gabion walls, traditionally used in civil engineering and landscaping, are wire containers filled with rock, concrete, or sometimes sand and soil, offering both durability and a natural appearance. This article explores the steps to successfully build a DIY gabion wall, ensuring maximum cost-efficiency while maintaining structural integrity and appeal.
Filling the baskets is where creativity meets practicality. Begin filling with larger stones at the visible facades, arranging them by hand to present a polished appearance, while smaller rocks can fill in gaps inside the cages to maximize volume economy. Ensure the stones are packed tightly, putting heavier stones at the bottom to enhance stability. Positioning the filled gabions in place entails careful alignment to prevent mishaps in structure over time. When stacking baskets, stagger the joints along different layers for enhanced strength, similar to laying bricks. Additionally, connecting adjacent baskets with wire ties adds cohesion and prevents bulging under pressure over time. Once the wall reaches its intended height, securing the top with a lid fixed by ties or clips finalizes the construction. The topmost layer can be finished with attractive stones or integrated with themed plantings to blend the wall into any environmental or design theme. Proper maintenance ensures the longevity of a DIY gabion wall. Regular inspections for wire corrosion or displaced rocks safeguard against structural failures. Treating steel wire baskets with anti-rust coatings or employing galvanized and PVC-coated wires prolongs their lifespan under harsh weather conditions. By following these calculated steps, one can achieve a reliable and visually appealing gabion wall at a fraction of commercial prices. The guiding principle remains using locally available materials and simple engineering techniques—resulting in an eco-friendly solution that brings professional-grade outcomes within reach of the DIY community.
Filling the baskets is where creativity meets practicality. Begin filling with larger stones at the visible facades, arranging them by hand to present a polished appearance, while smaller rocks can fill in gaps inside the cages to maximize volume economy. Ensure the stones are packed tightly, putting heavier stones at the bottom to enhance stability. Positioning the filled gabions in place entails careful alignment to prevent mishaps in structure over time. When stacking baskets, stagger the joints along different layers for enhanced strength, similar to laying bricks. Additionally, connecting adjacent baskets with wire ties adds cohesion and prevents bulging under pressure over time. Once the wall reaches its intended height, securing the top with a lid fixed by ties or clips finalizes the construction. The topmost layer can be finished with attractive stones or integrated with themed plantings to blend the wall into any environmental or design theme. Proper maintenance ensures the longevity of a DIY gabion wall. Regular inspections for wire corrosion or displaced rocks safeguard against structural failures. Treating steel wire baskets with anti-rust coatings or employing galvanized and PVC-coated wires prolongs their lifespan under harsh weather conditions. By following these calculated steps, one can achieve a reliable and visually appealing gabion wall at a fraction of commercial prices. The guiding principle remains using locally available materials and simple engineering techniques—resulting in an eco-friendly solution that brings professional-grade outcomes within reach of the DIY community.
Latest news
-
Wire Mesh Thickness Impact on Gabion Wall Load Bearing
NewsAug.12,2025
-
Ultimate Guide to Hexagonal Gabion Box
NewsAug.12,2025
-
Types of Rocks for Gabion Baskets Durability and Aesthetics
NewsAug.12,2025
-
Standard Gabion Box Sizes and Their Industrial Applications
NewsAug.12,2025
-
Easy Guide to Building Garden Gabion Cages at Home
NewsAug.12,2025
-
Drainage Solutions for Gabion Mesh Structures
NewsAug.12,2025
-
Visualizing Gabion 3D Integration in Urban Landscapes with Rendering
NewsJul.23,2025
Manufacturer of Silk Screen Products
QuanhuaProvide high-quality products and services to global customers.
-
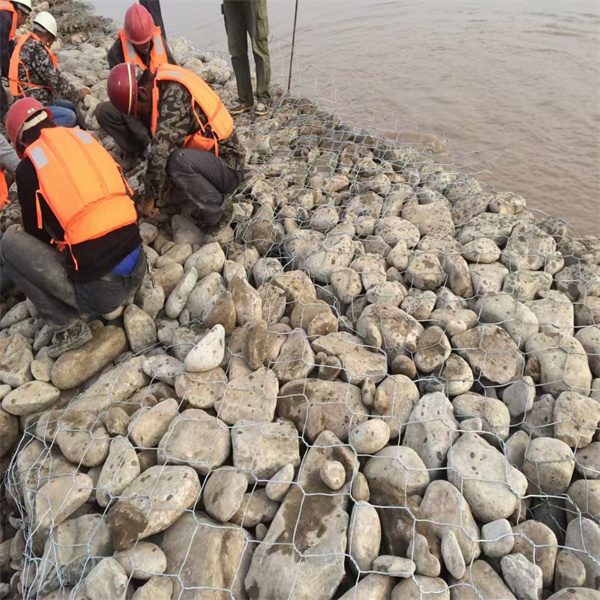
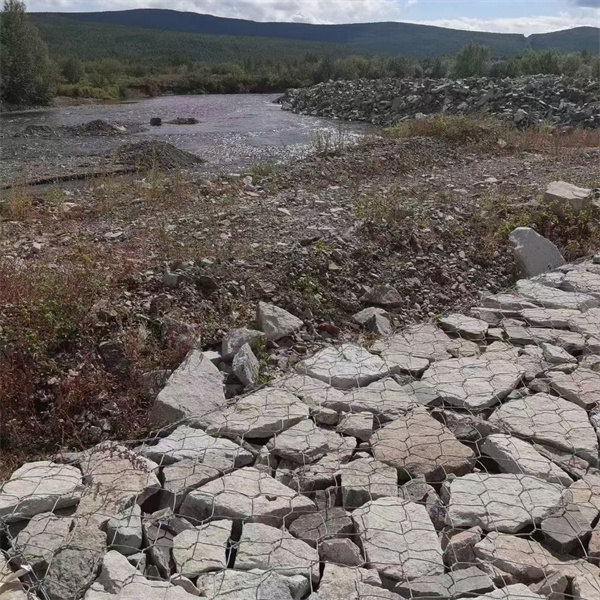
 Gabion Mattresses serves as a retaining wall, providing various prevention and protection works such as landslide prevention, erosion and scour protection as well as various type of hydraulic and coastal protection for river, sea and channel protection. This Gabion Mattress System is made up of a specially designed composite in order to maximize its performance through three phases of vegetative process from unvegetated to vegetation establishment up to vegetation maturation.
 -
 The hesco barriers is a modern gabion primarily used for flood control and military fortifications. It is made of a collapsible wire mesh container and heavy duty fabric liner, and used as a temporary to semi-permanent levee or blast wall against explosions or small-arms. It has seen considerable use in Iraq and Afghanistan.
 -
 3D Triangle bending fence panels an economical version of the panel system,
constructed from a Welded Wire Fence with longitudinal profiles that forms a rigid fence.Due to its simple structure ,easy installation and nice appearance,more and more customers regard this product as the preferred common protective fence. -
 A chain link fence is a type of woven fence usually made from galvanized or PE-coated steel wire.Chain link fence is a kind of elastic woven net, the net hole is even, the net surface is smooth, the net is simple, beautiful and generous, the net silk is high quality, not easy to corrode, the life is long, the practicability is strong.
 -
 Gabion basket also named gabion boxes, is weaved by corrosion resistance, high strength and good ductility galvanized wire or PVC coating wire through mechanical. Wire's material is zinc-5% aluminum alloy (galfan), low carbon steel, stainless steel or iron.
 -
 The gabion basket is made of twisted hexagonal woven mesh. The metal wire used to make gabion baskets is made of soft tensile heavy galvanized steel, and PVC coating can also be used for additional corrosion protection when the application requires.