12 月 . 11, 2024 11:43 Back to list
install gabion wall
How to Install a Gabion Wall A Comprehensive Guide
Gabion walls are increasingly popular choices for landscaping and civil engineering projects. Made from wire mesh filled with rocks, stones, or other materials, these structures provide robust support, erosion control, and aesthetic appeal. Installing a gabion wall can be a manageable DIY project or handled by professionals, depending on the project's scale. In this article, we’ll guide you through the essential steps to install a gabion wall effectively.
Step 1 Planning and Design
Before you begin, it’s crucial to have a plan. Determine the purpose of your gabion wall—whether it’s for erosion control, decorative purposes, or structural support. Measure the area where the wall will be constructed, including height, length, and width. This will help in calculating the amount of materials needed.
Next, choose the size of the gabion baskets. They come in various sizes, typically ranging from 0.5 to 1 meter in length. If you’re looking for a natural look, select stones that are similar in color and size to blend with your landscape or other existing structures.
Step 2 Gather Necessary Materials and Tools
To construct a gabion wall, you will need
- Gabion baskets (available at home improvement stores or online) - Fill material (rocks, stones, or concrete) - Wire cutters - Gloves and safety glasses - A level - A shovel - A mallet - Landscape fabric (optional)
Step 3 Site Preparation
Clear the area where you plan to place the gabion wall. Remove any grass, roots, or debris to create a stable base. If the wall is over 1 meter high, consider digging a trench to help with stability. The trench should be about 15 to 30 cm deep, depending on the height and intended use of the wall.
After preparing the site, you might want to lay down landscape fabric. This helps prevent weeds while allowing water drainage, which is crucial for the longevity of the wall.
Step 4 Assemble the Gabion Baskets
Assembling gabion baskets is straightforward. Unfold the baskets and connect them using the supplied wire or ties. Use wire cutters to trim any excess wire. Make sure the baskets are sturdy and properly formed to hold the fill material securely.
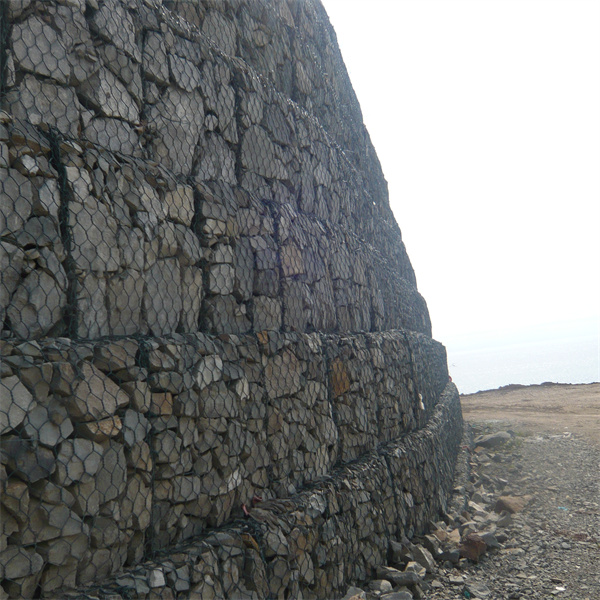
install gabion wall

Step 5 Positioning the Gabion Baskets
Once the baskets are ready, position them in the prepared area. Start with the first basket and check its level. If needed, adjust it using a shovel to create a level foundation. Secure the first basket in place before proceeding with additional baskets.
Step 6 Filling the Baskets
Filling the baskets is arguably the most rewarding step. Start at the base and fill each basket with your chosen material. For a more uniform appearance, organize the stones in a visually appealing manner. It’s essential to fill the baskets tightly but avoid overpacking, which could compromise the structure. Use a mallet to settle the stones in place and ensure stability.
Step 7 Closing the Gabion Baskets
After filling the baskets to the desired height, it’s time to close them. Secure the lids of the baskets using the provided wire ties, ensuring that they are tightly closed. This will prevent the stones from spilling out and enhance the wall’s durability.
Step 8 Final Adjustments
Once the baskets are filled and secured, double-check the level and alignment of the entire wall. Make any necessary adjustments using a shovel or by repositioning the baskets.
Maintenance
Gabion walls are relatively low maintenance, but periodic checks are recommended. Inspect the structure after heavy rain or storms to ensure it remains stable. Refill any gaps where stones may have shifted.
Conclusion
Installing a gabion wall can enhance the functionality and aesthetic of your landscape. Not only do they control erosion, but they also serve as visually appealing features. By following these steps, you can successfully install a gabion wall that can last for years with minimal maintenance. Whether you choose to tackle this project yourself or seek professional help, you’ll enjoy the benefits of a sturdy, attractive structure in your outdoor space.
-
Why PVC Coated Gabion Mattress Is the Best Solution for Long-Term Erosion Control
NewsMay.23,2025
-
Gabion Wire Mesh: The Reinforced Solution for Modern Construction and Landscape Design
NewsMay.23,2025
-
Gabion Wall: The Flexible, Seismic-Resistant Solution for Modern Landscaping and Construction
NewsMay.23,2025
-
Gabion Wall Solutions: The Durable, Decorative, and Affordable Choice for Every Landscape
NewsMay.23,2025
-
Gabion Basket: The Durable and Flexible Alternative to Traditional Retaining Walls
NewsMay.23,2025
-
Gabion Basket: The Proven Solution for Slope Stability and Flood Control
NewsMay.23,2025
-
Versatility of Chain Link Fence Gabion
NewsMay.13,2025


